| In den Artikeln sind häufig Partnerlinks enthalten, überwiegend zu Amazon und eBay. Durch einen Klick darauf gelangt ihr zum Anbieter und wenn ihr dort etwas kauft, bekommen wir eine kleine Provision. Euch entstehen dadurch keine Nachteile, ihr helft so aber, dass die Seite weiterhin existiert und dafür danke ich euch! :) |
Here’s a how-to in the case, your dishwasher door is suddenly much more heavy and it is pretty hard to close it. It is pretty easy to repair, so you don’t have to call the service! No worries!
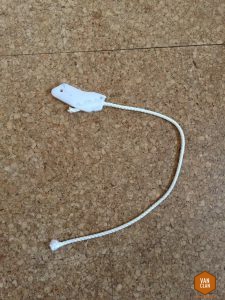
For six months, our Siemens dishwasher has been a bit strange. From one to the other, the door seems to be much heavier. It feels like it’s going to hit the ground when it is released. A few days later, reopening spit out a piece of string with a plastic part, which I identified as a kind of brake cable. A short look under the dishwasher brought no further realization, how this rope could have been installed.
For those who do not want to read now and repair instead: buy this repair set (if you’re from the US) or this repair set (if you’re reading from the UK), or – at least – this set (if you’re a German reader), take the dishwasher out, open the sides, insert new spring incl. cord, finished. Effort: 15 minutes for middle gifted craftsmen.
As the closing was now more difficult and the opening – especially for children – became more dangerous, but still a certain braking effect was there, we had relatively quickly accustomed to it and lived with the situation. I screwed up the door in between, but found no solution.
Now this week a second piece of string lay on the floor. The flap was now hard to close and something had to be done. After my wife then said that she would call the service now, my ambition was aroused. To put it briefly: I would not blame the Bosch Siemens Group, of course, for a planned obsolescence, but if you look at the defective parts you could somehow get the idea. The solution is luckily simplistic and – I claim – also by laymen to cope quickly.
The tool needs only a wide screwdriver, a star Torx T20 (at least for me – with other machines, of course, there can be other screws, but you should have a nice bit set in the household anyway), a hammer or strong fingers and possibly a tong (went with me without).
 The first thing to do is to unplug the power supply. Or risk it. Note: Of course, everything is your own risk. I consider the procedure very simple, but do not want to exclude that you can hurt yourself or worse! First of all, possible shutters of the kitchen furniture are taken away, so that one comes to the feet of the dishwasher. The feet on the right and left are screwed in, so that the machine is lowered. Before making sure that the dishwasher is nowhere attached to the cabinets of the kitchen (with me not the case). When the dishwasher is lowered, the rear foot probably needs to be turned up. This happens via a screw at the front in the middle. Now pull the machine forward – do not try to pull the door so that it does not fall. If you are still very clever, make sure that the machine has run before and is clean and empty. How that goes, I do not know unfortunately and at this moment my wife was not there, so I had to repair them full and dirty ;-)
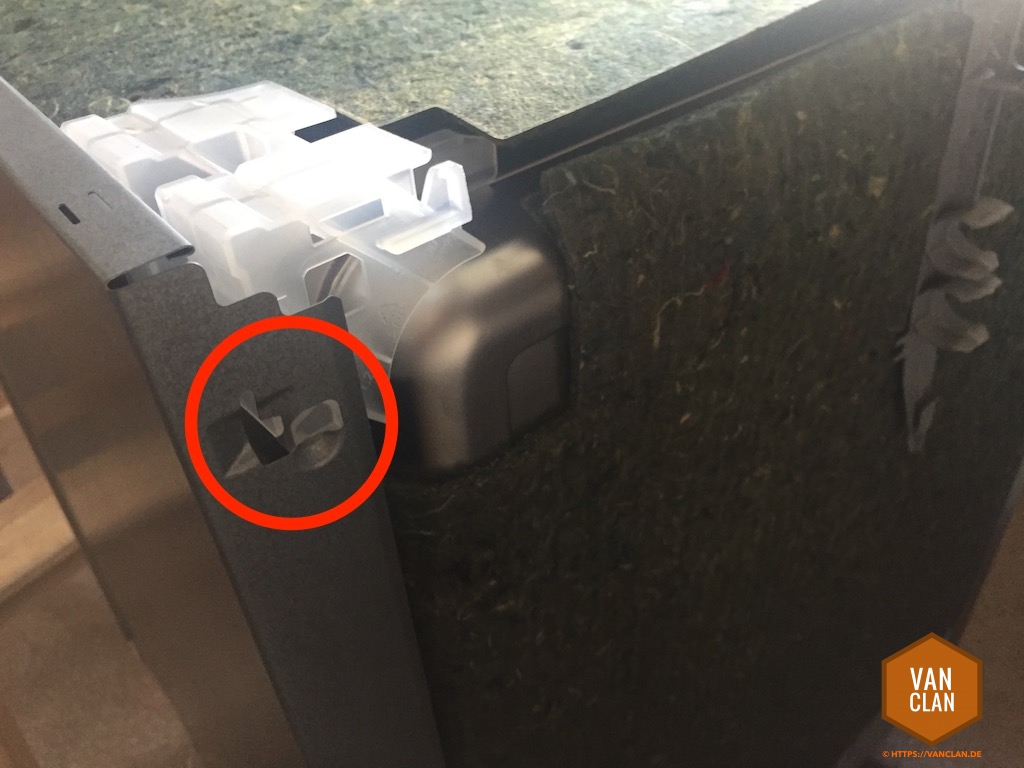
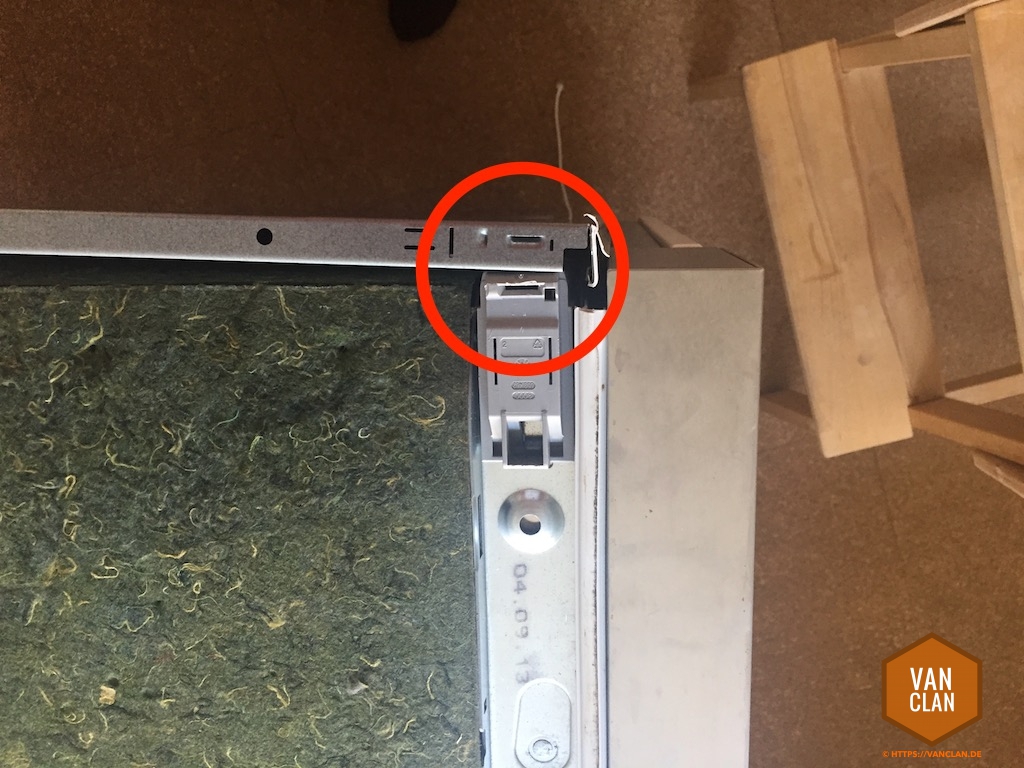
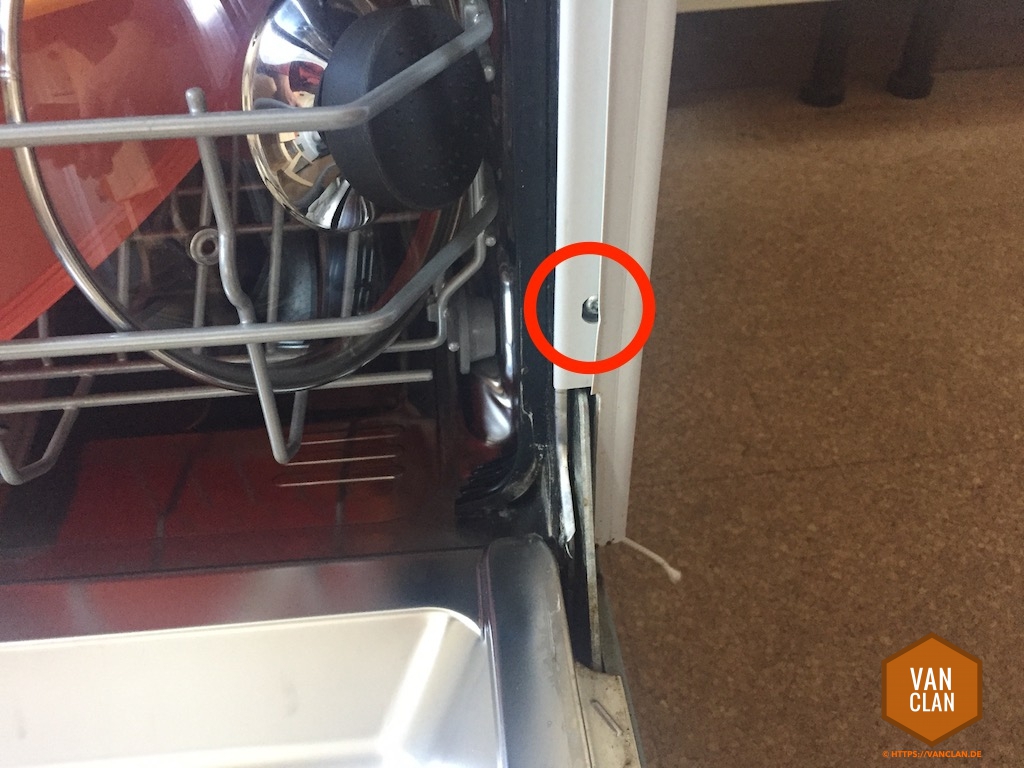 The side panels of the dishwasher are either screwed or – as with me – just plugged in and secured with a single screw at the front of the door. You’ll see it quickly and easily, if it is in front of you. If one side is open, you can see the broken cord or the broken spring – depending on what is still there.
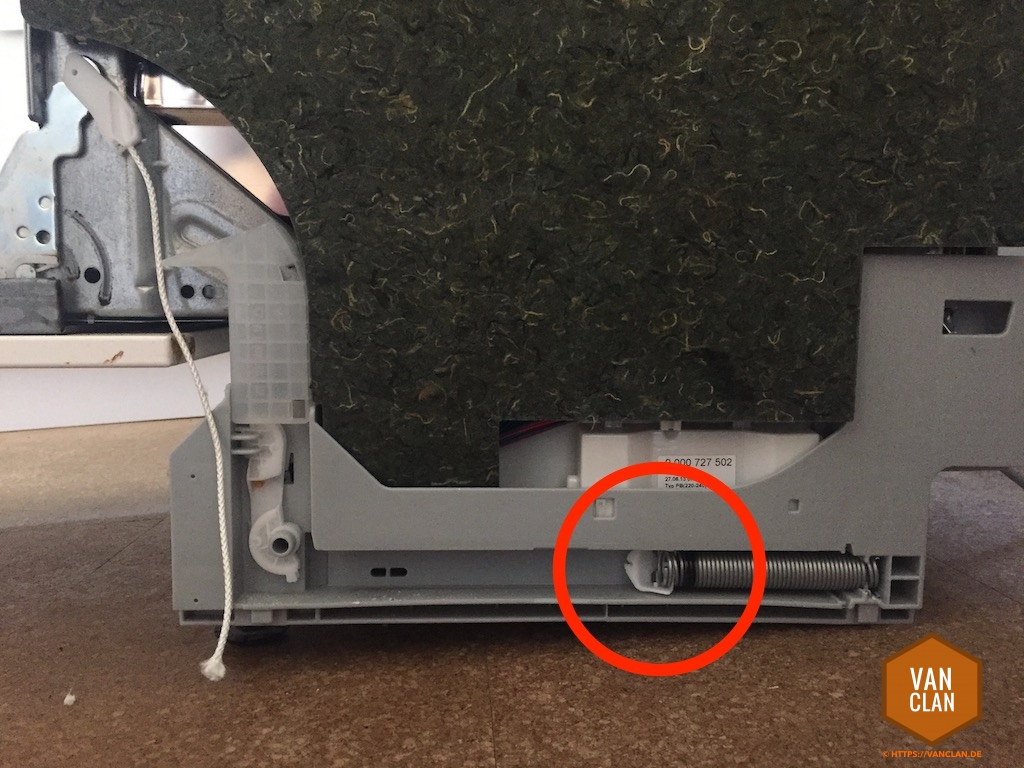 You also see clearly that there was damage to the suspension of the spring. Fortunately, however, no problem. Now you order at Amazon this set (US: Repair set; UK: repair set; Germany: repair set), wait one day for the delivery (assuming you are a Prime member – if you are not, you register for the free trial – US: Try Amazon Prime 30-Day Free Trial or UK: Try Amazon Prime 30-Day Free Trial) and then it goes on. Maybe you’re some lucky guy and Amazon offers same day delivery at your place – I’m writing from Germany and there is rarely such thing like same day delivery. I guess, all of you US-guys get everything delivered by drone within minutes..? Milk, eggs, cars, tanks,..? ;-)
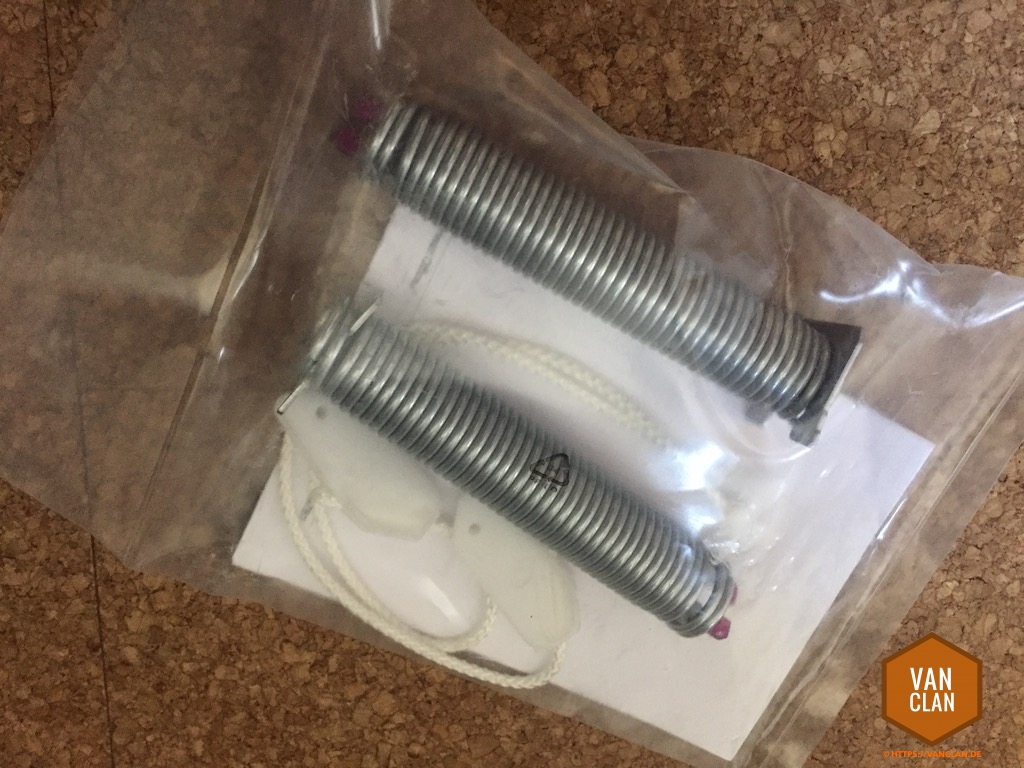
 The set contains the two springs, two cords, two plastic hooks and instructions (from now on it is self-explanatory). The old spring gets out with a bit of levers with a screwdriver quite well – if necessary try with a pair of pliers) and the new one is fixed with two or three hits by hammer. Now insert the plastic hook into the door and carefully close it.

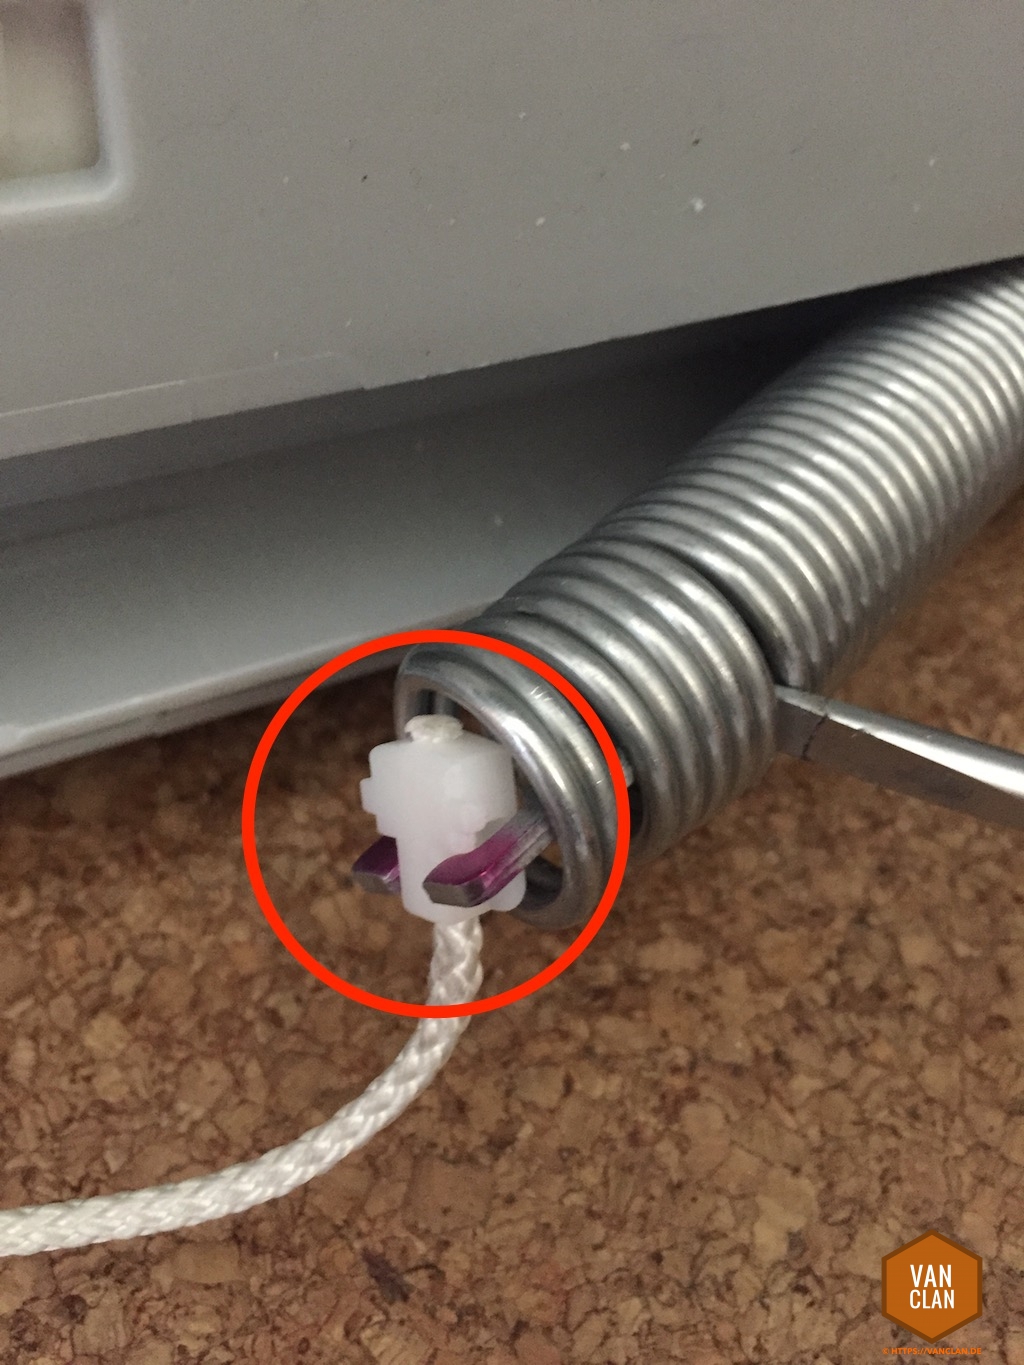 Care must be taken to ensure that the cord is placed correctly and that it is pulled slightly when closing so that the hook remains in place. By the way, the manual recommends first to hang the cord on the spring and then to attach the hook – for which purpose the spring must be tensioned and the hook must be hooked at the same time. I think this is harder than hanging the hook first. When you have closed the front flap, you can hang the cord outside the guide rails into the spring and then have to tension the spring only a little bit, so that you can now pull the cord into the guide rails. No matter how you do it, it goes relatively well. I had strained the spring with a screwdriver in the middle of the coils and then pushed it to the left.
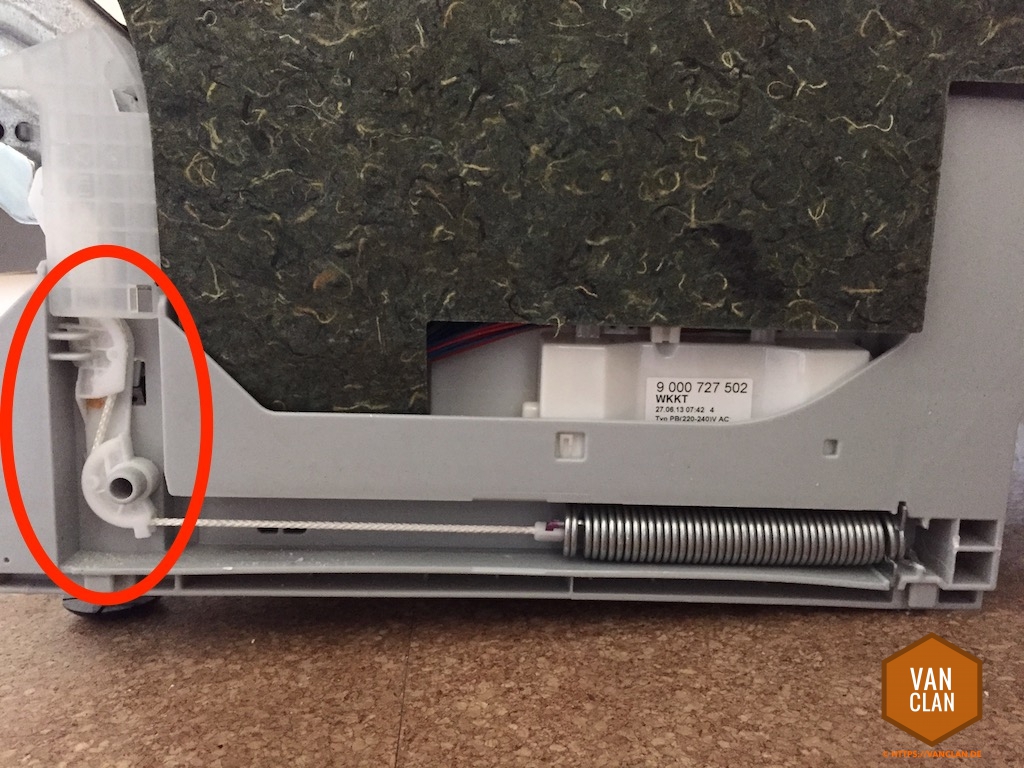 That’s it already on one side. Close the side again and do the same the other way, done! Do not worry about the parts. The linked set fits 60cm wide machines and there are different spring strengths, but in my opinion one can ignore this. The flap does not fall with me now down, but must be pressed a little, it means the spring is perhaps a little bit too strong, but it does not bother at all. I wish you success!
| In den Artikeln sind häufig Partnerlinks enthalten, überwiegend zu Amazon und eBay. Durch einen Klick darauf gelangt ihr zum Anbieter und wenn ihr dort etwas kauft, bekommen wir eine kleine Provision. Euch entstehen dadurch keine Nachteile, ihr helft so aber, dass die Seite weiterhin existiert und dafür danke ich euch! :) |
How come your English is so bad? ;-)
That’s because, it is not mine, it’s googles! :)
Thanks so much for writing this! Very helpful!
Thanks for the article – really useful. On the bit about getting the old spring out – you have just suggested using pliers but I am struggling to do this. Maybe I am just not being rough enough with it. How is it attached? Am I breaking it out?
Exactly, you break off the plastic part. The new spring has a metal plate that is hammered in, so you don‘t need the plastic part. I used a screwdriver and get behind the spring and broke it out.
Excellent article, and I do not mind the translation at all. Thank you for taking time to share your expertise.
Thanks!!
Thanks very much. I am usually very bad at home repair but this was easy due to your step by step instructions.
Hi, I too have found the rope and plastic bit on the floor! Why does it fall off or is the mounting pin broken?